This week I had the pleasure, or should I say displeasure of replacing the heater core on a Chevrolet Trailblazer. This is not the older body style Chevy S-10 Blazer, but the newer body Trailblazer. The customer’s complaint was the usual of the windshield and side windows get fogged up when the heater or the defroster is on, and the sweet smell of antifreeze through the vents. After doing a cooling system pressure test and then letting the truck run to get nice and hot, when I turn the heater on you could definitely smell burning antifreeze in the vents. So after going to the parts department to get a price on the heater core and coolant, then giving the paperwork to the service advisor, he looked up the labor time to replace the heater core.
The labor on this job is seven hours. Since this was only the third one I’ve ever done I knew I was in for at least a solid seven hours of work to replace it. The first step in the long procedure of replacing the heater core is to remove what is called the “cross car brace”. This is basically a large metal structure that all of the dashboard components bolt to. This brace bolts to the firewall and everything else bolts to it. So in order to complete step one of removing the brace, everything on the front of the dash that you see has to come off.
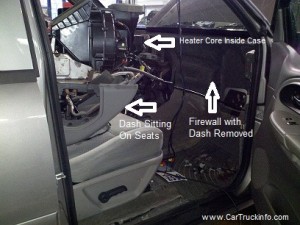
Once all of those parts are removed and you get down to the cross car brace I can remove it from the truck. Once that is out, I must remove the HVAC case from that portion of the dash. The heater core is actually inside the case that bolts to the inside of the dash.
Now since I have replaced a few of these heater cores on the Chevy Trailblazer in the past I thought there had to be a better way. There must be a better way than taking out 150 screws and 30 or 40 small to large trim pieces. You see, the center shift console has to be removed, which is comprised of six pieces in itself. The upper shifter plate has to come off, the shift handle, the console box where you put your CDs, the lower trim and then the frame.
Let’s not forget the steering wheel, steering column, gauges cluster, radio, air conditioning control panel, all the vents, lower dash panels and all of the wiring that connects all the switches, gauges and knobs. So I looked at the diagrams very closely to decide what parts could stay together in order to try and remove most if not all of the dash as one assembly. I came up with a strategy that would leave the bulk of the main dashboard components together, while still allowing me to disassemble the HVAC case and get to the heater core.
Even though I may have spent an extra half an hour looking at the diagram and thinking about how things would come apart and coming up with a plan, I figured it would save me at least two hours of labor and a lot of headaches. I left most of the main pieces together including the steering column. I left that bolted to the dash. Basically after removing a few side panels, the radio and A/C controls and the gauges cluster, I was able to get all the bolts that hold the entire assembly to the firewall and remove them. Then with the help of another mechanic we get on either end lifted and slid the entire dash off of the firewall and rested it on the front seats. From there I could get to the heater case bolts that house the heater core.
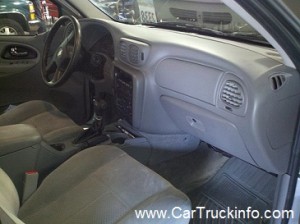
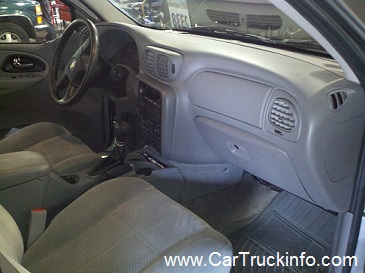
After installing the new heater core I called that same mechanic over to help me reinstall the dash. Since he helped me pull it out, it would still be fresh in his mind how to get it lined back up and reinstalled. Sure enough, I saved about two hours of my time and unknown number of scratches and cuts. Everything went back together well. After filling the coolant and charging the A/C with Freon, I let the Trailblazer run to get nice and hot and the smell was gone. See below for before and after pictures.
BEFORE

Trailblazer dash before heater core removal.
After

Chevy Trailblazer heater core removal and replacement procedure,.
Leave comments below or see these


Leave A Comment, Reply Or Ask A Question
5 Comments on "Chevy Trailblazer Heat Core Replacement Procedure Pictures"
Can I contact you so you can brief me on exactly what bolts need removed to remove the dash as you did?
That would be nearly impossible. There are so many that I would not even know how to describe their locations.
keep tires inflated toward max tire pressure recommended, clean air filter, clean engine oil, and try using premium fuel may cost more but maintains fuel systems and get more miles per tank and cheaper than adding additives. You can also add friction reducing additives to engine and trans/diff. to reduce friction internally to get more MPH and better performance.
I don’t know about you guys but damn my gmc envoy watses a lot of gas maybe 13 city the most and 18 hyway even though its a V6inline 4.2L, what should i do to improve my gas mileage besides getting a new car lol. i was thinking maybe get a tahoe its bigger and better looking with a V8 and same MPG
Try cleaning the fuel filter, sometimes that can help.